
Welcome to Blue Buzz Music, everyone!
A lot of people have this one particular question: “How to build a music studio if I don’t know much about how all this music stuff works?” Well, you are in luck, because I wrote this guide just to help you all make the music industry a better place.
Look, all these big websites telling you how to build a studio on a budget usually get writers and stamp these articles left and right. And don’t get me wrong, the information there is valuable as well.
The only thing is most of the bloggers haven’t been through all this themselves…
I had to do my research, been to hundreds of forums, read all the reviews on Amazon, and so much more to be able to speak on this topic.
Coming from the ground up, I realise how overwhelming building a music studio from scratch can be. More than anything, I want to share this knowledge with you.
The guide is relatively long, with personal examples, but you will learn a lot, I promise!
I will also add my personal picks to each point in this post for a reference!
Quick Navigation
Build Music Studio – Updated Guide For Beginners
First of all, I’ve decided to divide it into primary and secondary essentials. You must have the primary essentials to produce music. If you are going to be selling your beats or providing mixing and mastering services, you won’t need the secondary essentials. They come in place when you start recording instrument and vocals and adding extra equipment such as analog preamps, compressors, etc.
I’ve created this infographic to make things a little more clear for beginners.
Let’s take a look!

As you see on this home recording studio setup infographic, I’ve divided the essentials into two categories – primary and secondary – now let’s take a closer look!
Primary Essentials Are:
Computer
DAW (Digital Audio Workstation)
Studio Headphones
Secondary Essentials Are:
MIDI Keyboard
Studio Monitors
Audio Interface
Condenser Microphone
Dynamic Microphone
These are my picks and if you like a different model or brand – go with it! Alright, let’s learn how to build a music studio now!
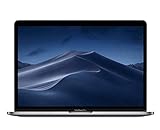
Computer
Computer For Your Music Studio
Let’s get the very first thing straight: you can’t use your phone to make music professionally. I know garage band and a few other apps on IOS, for example, do quite a few cool things.
I have seen people doing some great beats and even songs on them. But you can tell it’s been recorded on a phone. The quality and variability are lacking.
I assume you do have a computer at home.
However, is it powerful enough to use your DAW (digital audio workstation)? Yeah, minimum requirements you see are not quite good at representing how much CPU, RAM, or other stuff it will actually use.
You see, the DAW itself is nothing but a skeleton.
Once you add your kicks and snares, the load will increase. More synths and generators, the load will increase even more. And don’t even start me going about the mixing and mastering parts that come after you finish the beat.
My laptop, for example, did great in the beginning.
I made the beat, I even recorded the vocals. But the second I started EQing, compressing, and adding other plugins, I encountered lots of problems.
First, plugins stopped working properly. Secondly, I would hear clipping sounds all over my track. Lastly, it just crashed when I pressed “play”.
And the PC kept crashing until I turned most of my plugins off.
That’s when I realized that my laptop just wasn’t powerful enough to make the process all the signals coming in and out. And I started researching on what components you need on your computer to be able to make music and use your DAW to the fullest.
So look, here are 3 main specs you should consider when buying a computer for music production:
- CPU (Central Processing Unit) – the power of your PC for recording music
- RAM (Random Access Memory) – computers ability to perform multiple tasks (eg. running many plugins) simultaneously
- Hard Drive – the ability to store data and access it fast
Figuring out how powerful each element has to be is up to you. It depends on what you are going to do. If you are making beats, recording, mixing, and even mastering, you should pick something that will suit the power demands of your DAW and plugins.
My Personal Pick Is MacBook Pro.
Check out the list of the best computers for music production for more.
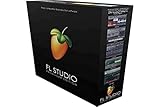
Digital Audio Workstations (DAWs)
DAW For Your Music Studio
Digital audio workstations are the paint set for an artist and a toolset for a mechanic. You can literally create anything in it. Besides my music, I also edit the sound for my YouTube videos in there too!
Sky is the limit!
It’s hard to get a hang of in the very beginning, DAWs are just capable of so many things. Even though the interface is user-friendly, it’s not an app where you have to press two buttons and the track it good to go.
It takes weeks to get used to the basics and months, if not years, to master every aspect of your digital audio workstation.
Hey, don’t get discouraged, you don’t have to know it all! Baby steps are where it’s at, my friend. Also, another little thing… There are so many of them in the market right now, it’s hard to pick one.
They all look great and you see famous DJs and musicians using different ones. So you feel like you want to jump on this DAW today and that DAW tomorrow… I relate to that.
Pick one DAW and stick to it, skills and proficiency will come with time.
You don’t want to learn the workflow (it will take a while) on a DAW just to switch because apparently, it’s not the best one out there.
If you go for the top DAWs, they are all similar.
You got the same playlist, channel rack, piano roll, mixer, and so on. The difference is the interface, the workflow, the plugins.
I can be biased because I’ve been using Fruity Loops since I was 16, plus I’ve never had a Mac (We all know Mac users love Logic and Pro Tools).
[Updated: I’ve actually purchased a MacBook Pro recently]
I’ve heard many times that Pro Tools is considered an industry standard. Well, before you all fire up and decide that then you want Pro Tools, let me disappoint you just a little.
The Ultimate Edition (which is the so-called standard) comes at an astonishing price of $999.99 a year!
Yeah, you’ve read that right!
Are you ready to commit to paying $1000 with no guarantee you will get any money out of it? I am not, not even close. Once you work in an actual studio and have actual artists coming and recording, then go for it!
You will probably have other things than money to worry about. For now, let’s stay humble, at least for a bit.
My Personal Pick Is FL Studio.
Check out the list of the best DAW for beginners for more.
Don’t think about picking a software too much, because it’s a lot more about how to use it! My advice is to pick one and learn how to use it to its fullest!
Studio Headphones
Studio Headphones for Your Music Studio
Okay, next part is picking up good well-balanced headphones to make your music.
I start with headphones and not studio monitors because they tend to be more affordable and a lot more compact. Moreover, you can use them on the go, if you have a laptop. I will definitely talk about the best studio monitors later in this post.
So why do you need a new pair if you have your AirPods headphones or Logitech speakers?
Well, that’s actually an excellent question, which I used to ask myself. See, when you listen to a song in your average headphones, it equalizes it to sound great. Or sometimes it EQs it to be bassy, or to enhance the vocal’s frequency range.
With headphones designed for music production, the sound tends to be more “real”, without a lot of alternations to it.
So let’s say you use your Logitech speaker and subwoofer set, which would’ve cost you $500, and it sounds amazing. You fall in love with the beat and keep working on it for days.
Then you send it to a friend who uses cheap speakers on his laptop.
And you know what he tells you?
“I don’t know man, it’s alright I guess but I feel like you can do better” It’s quite shocking and you get all mad because it sounds just great with your set of speakers!
How is this even possible?
Well, that’s because the sounds you were using were equalized on the playback, so you didn’t listen to the actual track you made! It gets so many beginners it’s crazy!
Well, by reading everything to this point you already made sure you won’t fall for this!
This is crucial!
Okay, in this example I kind of tried to picture why you need a pair of headphones specifically designed to do this kind of stuff. They can go way up into thousands, but we are trying to stay on a budget right?
At this step, you are pretty much good to go…
If you just wanna make beats in the cheapest way possible and, let’s say, sell them, that’s all you will need. An excellent headstart, let’s put it this way.
My Personal Pick Is Audio-Technica ATH-M50x Professional Monitor Headphones.
Check out Audio-Technica ATH-M50x Review.

Check out the list of the best budget studio headphones for beginners for more.
If you want to have more control and flexibility when working on the beats and also record vocals and/or instruments, keep reading!
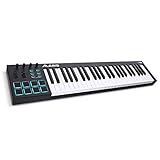
MIDI Keyboard
MIDI Keyboard for Your Music Studio
Why should you bother buying a midi keyboard? Hmm, interesting… I know you don’t really need to get one in order to make the most fire beats, but wouldn’t you want to make your life a lot easier?
This is not a necessity, but it will save you a lot of time when working on a nice melody or a bass track, for example.
It’s so much easier when you have keys in front of you!
Moreover, you will have to learn music theory at some point and having a keyboard in form of you helps a lot. If you install a simple piano synth you can learn how to play the piano! Don’t you tell me this is not exciting…
All jokes aside, it’s not just a keyboard.
They usually come with drum pads and knobs. Why do you need pads?
Well, people argue that when you record the automation for your kicks, snares, hi-hats, or literally any other percussion, it feels a lot more natural and appealing, than when you just put them on the grid in the piano roll.
MIDI keyboards save you a lot of time with percussion too, trust me on this!
With the knobs, you can literally automate anything. EQ, compression, reverb, delay, filters — literally anything! When using a mixer, you can automate the on/off buttons on your midi to turn on/off a certain plugin.
Let’s say a reverb… You want to record one part with the reverb on, and the other one with the reverb off.
You have two options here!
You either create an automation clip and tweak it, or simply use the button when recording it. It’s a lot easier to use the buttons if you know what you are doing, you feel me?
Check out the list of the Best MIDI Keyboards For Beginners for more.
It will take some time to learn how to operate and automate everything, but after this everything will be so much faster and easier to do!
My Personal Pick Is Alesis V49 USB MIDI Keyboard
Check out Alesis V49 Review.
Studio Monitors
Studio Monitors for Your Music Studio
If you have a pair of headphones, you don’t technically need studio monitors, right? Well, why does literally every studio you see on YouTube or somewhere else on the Internet has a pair? Or more likely, a few pairs.
And all these studio monitors cost a lot of money…
Do you think they are just balling out of control and buying stuff they don’t need? Of course, some of them do. But most of them know the value of a good pair of studio monitors. Once again, they don’t have to be expensive for now.
So your question is probably “Why?” Well, that’s something called having two reference points. You see, the distance between your ears and the headphones is a few inches. Your ears get used to THIS distance swift.
Same with the monitors…
The distance is a lot more, around a foot or so. Therefore, your ears get used to THAT distance now. If you make music, people will probably listen to it in different ways: in the car, at home, at the gym.
The systems will also be different — you probably have a speaker at home, but you wear headphones at the gym.
Therefore, you want to try to make it sound good on both devices!
And that’s pretty much the purpose of studio monitors in general. You can go for either headphones or monitors, but having both will increase the overall performance dramatically.
My Personal Pick Is Mackie CR4 Creative Reference Multimedia Monitors.

Check out the list of the best budget studio monitors for beginners for more!
The best way to connect them to your computer is with dual quarter-inch (1/4) cables through your interface. Speaking of the devil…
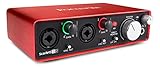
Audio Interfaces
Audio Interface for Your Music Studio
An analogue audio interface doesn’t really do anything independently, it’s more of a connect-everything-together kind of device. To start, you just connect it to your computer and download a few drivers.
That’s it, it’s good to go! Feel free to connect your headphones, monitors, microphones, and musical instruments to it.
I know, it’s really the simplest device in the studio.
Interfaces usually have a lot of knobs and buttons to increase/decrease the volume and turn on/off certain functions of it. The more you spend on it, the more functionality you get usually.
Or you are just paying for the hyped up brand… Always use common sense and do your own research when picking any electronics, because sometimes they have functions you’ll never ever use.
Here is an entire post dedicated to the best audio interfaces for beginners.
My Personal Pick Is Focusrite Scarlett 2i2.
Check out Focusrite Scarlett 2i2 Review.
Let’s move to once of the most crucial parts of every music studio – microphones!
Studio Microphones
Studio Microphones for Your Music Studio
Wow, if you are on this section, you must really want to go all in! Respect and congrats, we are almost done! Just a bit about microphones and accessories, and you will have a solid foundation! Okay, so let’s talk about mics.
Like what’s the difference really? I mean all mics are similar right? Uh oh, you are just a little off here, microphones are actually something to talk and talk about…
I’ll make it as short as possible, deal?
So there are a bunch of microphone types for very and I mean VERY specific tasks, but the main two categories are Condenser and Dynamic mics.
Check out the list of the best budget microphones to record your vocals for more!
Condenser Microphones
Condenser Microphone For Your Music Studio
One can argue that these are the mics most commonly used in studios, which is true to an extent. They tend to be more responsive to a higher range of frequencies, and the transient response is a lot greater.
Simply speaking, it’s kind of microphone’s ability to reproduce the velocity or so-called “speed” of a vocal or an instrument.
Condenser mics usually require a 48-volt power supply.
That’s when the interfaces come in very handy, as most of them have a switch to provide all this power. Therefore, you can’t simply plug it into your computer and start working right away, you know?
As I said at the very beginning of this chapter, they are being used in studios more.
Why? Because they are fragile as hell! You have to be really careful because some components in the condenser mics, usually the most precious ones, are very easy to break. You pull on the XLR cable by accident and the stand collapses — big trouble.
They are usually divided into 2 broad categories: LDMs and SDMs.
Large diaphragm microphones (LDMs) — are usually picked for a vocal performance. While they don’t reproduce everything as evenly, as SDMs, they warm up the output signal a.k.a. your voice or an instrument a lot better than the small diaphragm mics. The sound ends up sounding more natural.
Small diaphragm microphones (SDMs) — are, as I mentioned before, better with capturing frequencies more evenly. By getting probably the best transient response, they are great for reproducing quicker sounds, such as a guitar or ukulele, especially when you are trying to record a sick fingerpicking pattern you recently learned.
My Personal Pick Is is Behringer B-1

Check out my list of the best condenser mics for vocals for more!
Let’s move to the next type of mics now, the fewer details, the better they will settle in your head, trust me!
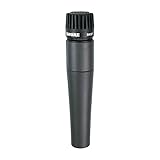
Dynamic Microphones
Dynamic Microphone For Your Music Studio
These guys are typically thought of as performance mics you would usually see on stages. And that’s true, they are a lot more common during live shows due to their durability and moisture resistance.
Yes, they rug them so well they can be used even when it’s raining! Don’t get me wrong though, I generalize to make it simpler, but there is a lot of this kind of microphones in the studios as well.
Dynamic microphones are used slightly differently than condenser mics.
When using one of them, you will high likely lose some frequencies, usually on the very low and the very high ends. It’s because of the sound quality they deliver is not as accurate, that’s it.
Usually suitable for louder guitar and drums, and on-stage vocals of course, as they can manage to handle a lot higher sound pressure levels.
Check out my list of the best budget dynamic microphones for vocals for more!
My Personal Pick Is Shure SM57-LC Cardioid Dynamic Microphone.
This is the most important stuff you need to know about them, but as I said, people literally go to school and take classes to learn about specific details about different mics.
If there is enough demand and you want to know more — let me know — and I will write a very in-depth post about this in the future!
Microphone Accessories
Mic Accessories for Your Music Studio
Check out the list of the best microphone accessories for beginners for more!
Both condenser and dynamic microphones need an XLR cable to connect them to your interface. You get them for cheap on Amazon or at a local store.
Don’t cheap out on a pop filter.
It costs very little but is very beneficial, especially when recording vocals.
You will get rid of all the popping sounds (here is where the name comes from!) and removes plosives (simply speaking “B” and “P” sound) which can add a lot of unnecessary and bassy frequencies!
You also need something to mount your mic on, right?
So yeah, get a simple tripod stand or an arm stand. Tripods tend to be more stable and you usually see them in the booths. An arm stand works great if you have limited floor space (like a small room).
Both are flexible, adjustable and most of the time shock-absorbent!
My Personal Pick Is AmazonBasics XLR Male to Female Microphone Cable.

My Personal Pick Is Neewer Pop Filter.

My Personal Pick Is Samson MK-10 Microphone Boom Stand.

Home Recording Studio Design – How To Set Up?
Home Recording Studio Design
When building a music studio, there are tons of things you have to consider. Once you’ve purchased all the equipment that suits your needs, you have to put everything together.
Moreover, you’ll have to look into your home recording studio design.
You can’t set everything up in a closet and expect it to sound good, can you?
Therefore, there are a few things you have to keep in mind when taking care of your home recording studio design. I’ve made too many mistakes at the beginning of my journey to not share this information with you.
First of all, let’s look into the common mistakes I’ve made when building my music studio so you won’t waste your precious time repeating this after me.
1) Avoid These Mistakes When You Build a Music Studio!
We’ll go over 5 most common mistakes that producers encounter when they decide to build a music studio for themselves. These mistakes may sound silly to some, but there are tons of people I know who did that in the past. Better safe than sorry!
Building a Music Studio in a Small Room
In small rooms, sounds bounce off the walls constantly. As a result, the smaller the room, the worse the recording quality. If the room is treated correctly, this will be less of a concern, of course.
However, the rule of thumb still stands – the bigger the space, the better.
There are other reasons such as having more people in your music studio aka your room and being able to use more hardware equipment while planning the home recording studio design and setup. However, the most crucial difference is the quality of the recording.
Forgetting About Surrounding Noises
When I built my first music studio, I didn’t know how good microphones are at picking up noises. I was living in a small apartment downtown.
I’ve had cars hoking all day long, people walking around and chatting next door, furnace working like a coal miner all winter long, and other noises I didn’t even realize were around me.
With time, I’ve learned to ignore the noises. I simply wasn’t aware of them anymore.
It was too bad that my microphone had something else in mind. After recording the first take on one of the verses, I’ve noticed I could hear the cars, wind, even my furnace. And I could hear something in almost every take I’ve recorded.
That was a stressful day, that’s for sure! The lesson I’ve learned is you have to either live in the middle of nowhere or treat your room properly. Which one do you think is the better option? Clearly, the second one!
Ignoring the Flooring Material
When working on your home recording studio design, a lot of producers overlook the flooring. Believe me; this is a huge mistake. The flooring material is crucial when you build a music studio.
Have you noticed how many professional music studios have hard flooring of wood or tile? Most of them!
Don’t you think there is a reason for that?
Most places here in Calgary have wood flooring, but there are a few with carpeted rooms, especially the bedrooms where people usually build their music studios.
Carpets are warm, lovely and all, but they tend to absorb some frequencies, mostly the high ones. As a result, your track ends up being muddy and full of low bass frequencies. Make sure never to ignore this factor of your home recording studio design. Always consider the flooring factor when you build a music studio in the future!
Building a Music Studio in a Room With Low Ceilings
This mistake is usually the problem in most apartments and basements. The ceiling can’t be too high because of all the weight coming from above. Not everyone lives in a big house, and sometimes an apartment has more space than you need.
Therefore, you must find a way around the issue of having low ceilings when you build a music studio!
The best way would be having less bouncing off the walls of your studio. That’s why you need to soundproof your room! We’ll talk about this in a bit!
Having Too Many Parallel Walls in Your Music Studio
If your music studio is a small square room, you are going to have a lot of extra noise in your recording. Parallel walls reflect a portion of the sound back to where it came from.
If you can imagine this in your head, you’ll realize that most sound reflections will come right back to your microphone, with a weaker intensity, of course.
Take notes to avoid these problems when you build a music studio for yourself!
If you plan more irregular surfaces when working on your home recording studio design, you’ll have a way lower chance of messing up your track!
If you are sure you haven’t made or successfully mitigated the problems mentioned above, we can move to the next step!
2) Clean Out Your Future Music Studio Space
This step is straightforward. Remove everything you don’t need from the room. If it’s your bedroom, you can only remove so many things. That’s understandable – not everyone can dedicate the entire room to just build a music studio in it.
The rule of thumb is simple – if you can remove it or get rid of it, you should! First of all, you’ll have a lot fewer distractions when working! Second, you’ll have more space for your equipment and fewer objects for the sound to reflect from.
3) Set Up Your Workstation
Once the room is as empty as possible, it’s time to set up your workstation. At this stage of home recording studio design, you should have all the necessary equipment you need for music production.
I mean you have a computer, headphones, interface, keyboards, monitors, compressors, and other hardware units.
A lot of the time producers would purchase a special desk to be able to accommodate all their music studio hardware equipment.
Sometimes it’s called “producer’s station.” It would usually be the most ergonomic and spacey solution when you build a music studio.
A regular table that your friend’s parents gave to you is not wrong for a beginner, but having a decent producer’s station will benefit you a ton in the long run.
You’ll also need a chair, but there’s little to think about here.
All it has to be is comfortable (and look cool). You’ll spend a lot of time in the studio, so make sure to weight the pros and cons of each setup to find the one that fits you the best!
4) Treat Your Music Studio Acoustically
Having an acoustic treatment plan when you build a music studio is essential. Even if your room is spacious and your equipment is fantastic, there is still a need to treat your room, so the sound doesn’t just reflect off the walls back and forth ruining your track.
A lot of producers use simple acoustic panels studio foam of different shapes.
They will absorb sound reflections, so your microphone doesn’t catch anything.
You can also invest in diffusers, which let a few reflections remain instead of absorbing them.
This will create a healthy balance of natural tones that can make any room sound similar to a professional recording studio.
That should be neither hard nor expensive to implement. However, this will change the quality of your recording dramatically. And in a good way!
5) Arrange All The Equipment to Fit
In this step of home recording studio design process, you’ll have to put all your equipment where it belongs. It means setting up your laptop or PC monitor in the middle, placing studio monitors on the sides, MIDI keyboard on the sliding panel of your desk, and so on.
Make sure everything fits and nothing is in the way.
It’s going to be a little harder if you have a regular desk, but you’ve probably kept that in mind while purchasing all the hardware. Think of who you are going to record. If you are recording yourself, setting the microphone by your desk when you build a music studio is a fantastic idea.
When recording multiple takes, it’s a pain to stand up and walk to the other end of the room every time.
If you record others, it makes sense to have it further from all the buzzing equipment you have at your desk and just take care of the recording process. Let others play instruments, sing, or rap.
There are tons of different setups that producers use such as the solo, dual, and hybrid setups. Most artists use the solo setup because then you won’t need two stations, but that’s up to your preference and, more importantly, budget.
6) Find Proper Studio Monitor Placement
After putting in so many hours to build a music studio, you might as well spend a few minutes focusing on a critical factor that’s being overlooked by many – positioning your studio monitors properly.
What’s the point of buying a set of expensive monitors when building your music studio just to mess up the setup and miss on the full experience of using the studio monitors.
It may seem like the easiest step, but it’s sure not.
You see, once you are done with setting up all your equipment and acoustic treatment panels and pads, you can adequately calculate where you should place the studio monitors with respects to the position of your head, walls around you, and the acoustic treatment.
Whether you’ll be able to leave them on your table or not simply isn’t up to your preferences but the setup of your room. A lot of the times producers have actually to purchase a set of studio monitors stands.
With stands, you can adjust the height, width, and angle at which studio monitors will be positioned.
You don’t see this element of home recording studio design a lot, and it is one of the most overlooked ones.
They can vary in prices a lot – from $100 to $1000s. Pick the one that will suit your needs the best.
7) Connect Everything Together
Finally, you’ve managed to get to the very last point of home recording studio design. No one ever overlooks this step because you do need to connect all your gear for the setup to work correctly.
However, very few producers who build a music studio think about the future.
Hopefully, your music will start bringing you some money. As a result, you’ll start buying more gear. Eventually, you’ll need actual analog compressors, EQs, delays, pre-amps, and a lot more.
Therefore, you should consider how you are going to plug everything in once you start adding more hardware. You should think about this at the last stage of the home recording studio design.
All you have to figure out is the signal flow.
For example, if you are recording a take on a microphone, where does the signal go? Most producers have it going through the interface directly into your DAW for beginners. Once you get more professional, you’d want to update your setup.
The signal will pass through the analog compressor first.
Then a lot of producers add a dedicated pre-amplifier as opposed to the one built into your audio interface. This is a well know practice and is encouraged if you can afford one. You’ll notice the quality right away!
This will modify your signal in a better way than any plugin within your DAW would’ve. However, this comes at the cost of buying the actual analog hardware.
But you see what I am talking about?
You need to know where your signal is going and what gear it should pass through first. That’s relatively simple once you’ve found your way around, nothing to worry about!
Check out the professional music recording studio setup in the video below!
Impressive, isn’t it?
Conclusion: Build a Music Studio
Let me think… Yeah, that should be everything to start! Don’t worry if it’s a little overwhelming. Usually, everything falls into place very quickly! As I promised, I am keeping this fairly basic!
Some common sense to understand before getting into the jungles of the small details that you probably won’t remember tomorrow, especially if this is fairly new to you. Little by little, you will learn more and more!
Don’t be too hard on yourself, okay?
Let’s wrap up for today!
Looking into DJing? Build your first DJ setup with my guide!
Last update on 2024-06-01 / Affiliate links / Images from Amazon Product Advertising API